shell basics
This subchapter looks at UNIX (and Linux) shell basics.
book conventions
The following conventions are used in this book.
Examples are displayed in a gray box. In the PDF version of this book the gray box does not appear, but the box is indented from the regular text. In the on-line version at www.osdata.com the gray box displays correctly. I need to find someone with a legal copy of Adobe Acrobat to help out. If you are in the Costa Mesa, California, area and can help out with a legal copy of Adobe Acrobat, please contact me.
Additionally, anything that will appear on the screen (whether you type it or the shell produces it as output) will appear in a monospace type. This will help identify the examples in the PDF version. This also applies to material contained in ordinary descriptive paragraphs that you will type.
$ date
Wed Nov 10 18:08:33 PST 2010
$
Bold face type is used to indicate items that you type.
There will be no indication of the correct locations to type RETURN or ENTER or other similar special characters. These normally happen at the end of every input line. There will be reminders in the descriptive text near the beginning of the book, as well as in other descriptive text where there is a need for a special reminder or an unusual convention or an unusual keystroke.
$ date
Bold italics type is used to indicate items that you must customize, such as file names or user account name. In a descriptive paragraph, these items will be in ordinary italics.
$ AccountName
Material that the shell will output will be in ordinary monospace type. In some cases where the material will be variable, the shell output will be in italics.
Wed Nov 10 18:08:33 PST 2010
VariableInformation
$
root or superuser
Do not run your terminal emulator or shell in root or superuser.
Root or superuser has complete control over the entire computer. A regular user account has limitations.
Experienced programmers run BASH as a regular user to protect themselves from destructive mistakes — and they are already skilled at using BASH.
A beginner running BASH as superuser or root can turn a simple typing mistake into a disaster.
If you already have a regular user account created, make sure you use it. If you only have the superuser or root account running, immediately create a regular user account and switch to it for all of your learning exercises.
Both the Bourne style shells (including BASH) and the C style shells display a # prompt when you are running the shell as root. Be careful.
#
starting your shell
NOTE: On a single-user Linux or Mac OS X desktop/laptop computer, you can start the Terminal program and be automatically signed in (no need for account login or password). On a remote server, you will always need to login in with at least account name and password.
Some information you may need includes the name or URL of your server or computer (sometimes called the host), your account name, and your assigned password. if you are working on a remote server (such as a web server), you need to get this information from your hosting company or system administrator. If you are using a large multi-user system, you need to get this information from your system administrator. If you are using a personal computer or workstation, you probably set these for yourself.
If you have just purchased a new personal computer or workstation, ask your salesperson for the defaults or look them up in the manual. Your install CD or DVD is likely to have a utility that can be used to create accounts and set passwords. The Mac OS X install DVD has utilities for both purposes.
If you are the first person to work with a large system or computer, refer to the manuals that came with your computer. You will find information on the root/superuser account. That is a powerful account and should be reserved for special occasions when that kind of power is needed. Look in the manual section with a title similar to “Getting Started” and then look for an account named user, guest, tutor, or similar name that suggests an ordinary user account.
You login remotely into a web server through SHH (Secure SHell). There are many SSH programs available. You do not have to have a matching operating system. You can use an SSH client program on Windows, Macintosh, Linux, or almost any other operating system to sign into a Linux or UNIX server.
You login into a large multi-user traditional command line UNIX system by typing your user name, ENTER, your password, and ENTER (in that order). This will enter you into the default shell set up for your account.
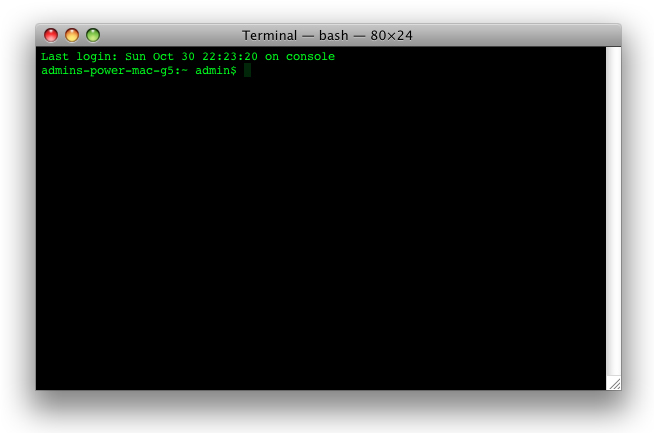
On a computer that runs a graphic interface (such as Gnome, KDE, and Mac OS X) you will want to use a terminal emulator program. Typically a terminal emulator program starts with you already logged-in to the same account that you have running in the graphic user interface.
On Mac OS X and most versions of Linux, the icon for the Terminal program will look like this:
On a Mac OS X computer, Terminal will be located in the Utilities directory, which is located in the Applications directory. When you find it, you can drag it onto the Dock to make it easily accessible. Apple purposely hid the UNIX command line to avoid confusing the typical consumer.
On Linux/KDE, look for Konsole or Terminal in the Utilities menu.
On Linux/Gnome, look for color xterm, regular xterm, or gnome-terminal in the Utilities menu.
On Ubuntu Linux, look in Applications menu > Accessories > Terminal. Single click and hold, then drag to your panel, because you will be using it a lot.
On some versions of Linux, you can press the CONTROL and the ALT and the F1 keys all at once to bring up Terminal.
In Gnome, use the Applications menu > Accessories > Terminal or the keyboard shortcut of CONTROL and ALT and T (all at the same time).

In KDE, use the KMenu > System > Terminal Program (Konsole).
In Linux Mint you can use the keyboard shortcut of holding down the CONTROL and ALT and T keys all at once.
As a last resort, you can use the file search feature in Linux or Mac OS X and search for “Terminal”.
You may want to try out the various terminal emulators and decide which works best for you (each offer slightly different features).
login and password
NOTE: On a single-user Linux or Mac OS X desktop/laptop computer, you can start the Terminal program and be automatically signed in (no need for account login or password). On a remote server, you will always need to login in with at least account name and password.
At the login prompt type your account name (in lower case letters) followed by ENTER or RETURN.
login: accountname
Password:
At the password prompt type your password followed by ENTER or RETURN.
Password: password
$
If you encounter problems, see the next subchapter for help.
prompt
Once the shell is running it will present a shell prompt. This shell prompt is normally the U.S. dollar sign ( $ ). Other common prompts are the percent sign ( % ) and the pound sign ( # ). The shell prompt lets you know that the shell is ready and waiting for your input.
$
The most common prompt in the Bourne shell (sh or bsh) and Bourne Again shell (bash) and Korn shell (ksh) is the U.S. dollar sign ( $ ).
$
When the the Bourne Again shell (bash) or Korn shell (ksh) is running as root or superuser, the prompt is changed to the U.S. number or pound sign ( # ) as a clear reminder that you are using a much more powerful account.
#
The Bourne Again shell (bash) shell typically reports the current working directory and user name before the $ prompt, often inside of square braces. An example:
[admin:~ admin]$
The most common prompt in the C shell (csh) and TENEX C shell (tsch) is the percent sign ( % ).
%
When running as root or superuser, the C shell (csh) shows the U.S. number or pound sign sign ( # ).
#
The Z shell (zsh) shows the short machine name followed by the percent sign ( % ).
mac%
When running as root or superuser, the Z shell (zsh) shows the short machine name followed by the U.S. number or pound sign sign ( # ).
mac#
Almost all of the shell examples in this book will use bold face to show what you type and plain fixed space characters to show shell output. Items that you need to modify according to your local needs are normally going to be presented in italics.
You are likely to see information before the actual command prompt. It may the current working directory. It may be the current user name. There are ways to change what is presented. For now, don’t worry about it, just be aware that you are likely to see some text before the prompt.
example command
You can run a UNIX (or Linux or Mac OS X) command (also called a tool) by typing its name and then the ENTER or RETURN key.
The following example uses the date command or tool.
$ date
Wed Nov 10 18:08:33 PST 2010
$
The format is: day of the week, month, day of the month, 24 hour time, time zone, year.
failed command
BASH will let you know when you have typed something it doesn’t understand.
Type “asdf” and then the ENTER or RETURN key. You should see a message similar to the following:
$ asdf
-bash: asdf: command not found
$
no news is good news
BASH follows the rule that no news is good news. If a command runs successfully, it won’t generate any output message.
As an example, when you use the cp command to coy a file, there will be no special notice on success. You will just be returned to the command prompt ($), ready for the next command.
comments, suggestions, corrections, criticisms
free music player coding example
Coding example: I am making heavily documented and explained open source code for a method to play music for free — almost any song, no subscription fees, no download costs, no advertisements, all completely legal. This is done by building a front-end to YouTube (which checks the copyright permissions for you).
View music player in action: www.musicinpublic.com/.
Create your own copy from the original source code/ (presented for learning programming).
Because I no longer have the computer and software to make PDFs, the book is available as an HTML file, which you can convert into a PDF.
Names and logos of various OSs are trademarks of their respective owners.